This was a lot of trial and error, but once I established a crafting template, I could easily replicate. So I thought, hmm....could I script my very own tutorial?
Here goes...
Step 1: headbands!

Step 2: sew a casing. That is, cut a long strip of fabric that's twice as wide as the widest part of the headband, plus a teensy bit more for the seam allowance. Make sure the fabric is just as long as the outer edge of the headband's curve, plus at least two inches longer on either side. Then, fold the strip hot-dog style and sew along one side.

Step 3: turn that casing inside out! Use a safety pin to catch one end of the casing.

Then, work the safety pin through the inside of the casing, by scrunching it along. A childhood friend taught me this trick when you want to re-string any kind of drawstring.
Once the casing is the right way, pull it over one end of the headband. (not shown in photos)
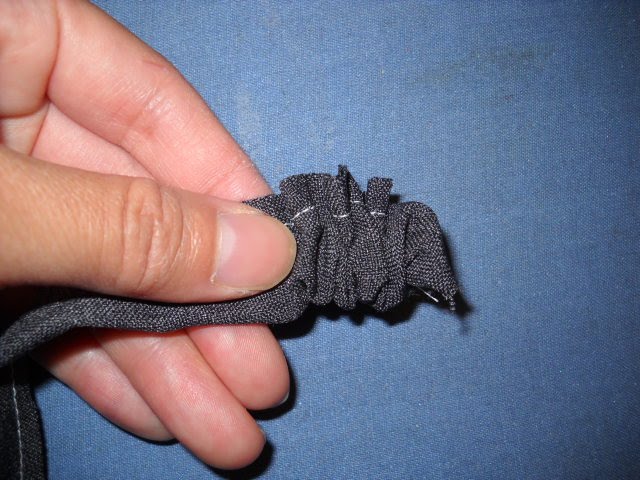
Step 4: This is where I fudge. To secure the ends of the fabric, I pleat over the ends and sew them under. This can be tricky, because you want the ends of the fabric to stretch as taut as possible if you don't want headband fabric to be all saggy.


It won't look perfect, but the ends are tucked behind your ears, anyway - who sees that part?
Step 5: Adorn away! I used hair accessories that may or may not look familiar. It's wise to try on the headband in the mirror to determine the placement of said adornment.

No comments:
Post a Comment